


In the event of an emergency, as you start making lists and taking inventory of the goods and foods you want to have on hand, the items you should either purchase and stockpile or make and prepare for the long term, milk is one that you would certainly want to include.
In terms of long-term sustainability, milk is, sadly, not the easiest food commodity out there.
Sure, powdered milk is here and that’s all right if it’s your only choice. But many object to the taste of reconstituted powdered milk. Another choice is shelf-stable dairy-free milks such as almond, macadamia, and oat, as are store-bought canned condensed and evaporated milks.
And it is canned milk products that are likely to have the longest shelf life, best by dates that most say they will remain viable for at least one year (experts, however, deem that in general, all canned food products will last and still be edible for at least two years).
Related: What Happens If You Put Silver In Milk?
Did you know that you can make your own condensed milk easily? When I say easily, I really mean easily. The toughest part is the frequent stirring that the process involves and waiting. There are also several explanations why you should make your own condensed milk, above and above the ease of doing so.
But first let’s describe clearly what, specifically, condensed milk is. Condensed milk is condensed, sweetened milk that has lost about 60 percent of its water content.
Evaporated milk is the same whether it’s a pure milk product with no added sugar or sweetener. Condensed milk is generally believed to have been produced to meet the nutritional needs of civil war soldiers.
Another explanation is that it was developed to feed sick, malnourished children who as refugees aboard ships from Europe, came to the United States.
Why Condensed Milk?
And yes, nourishing it has been and still is. Condensed milk is a perfect thing for preppers, survivalists, and anybody else who needs to be prepared and self-sufficient to have on hand in terms of calories.
There are 1,300 calories in a 14-ounce can the normal store size) (as well as 22 grams of carbs, 3 grams of protein, and a bit of calcium too). In such cases, it’s easy to see the importance of condensed milk. 1,300 calories may be extremely useful in a survival situation.
Other reasons to make condensed milk a part of your emergency pantry include:
- No electricity is required to store it.
- It will not attract rodents or insects.
- It does not need to be protected from humidity.
- Many uses and can be used as a substitute for other sweeteners.
- Much less storage space than regular or even alternative milk products.
- Shelf life of about two years.
Why Make It Yourself?
But why shouldn’t you just buy your condensed milk at the store? Why should you make it yourself?
- You should guarantee a safe cooking area and ingredients when you make it yourself. With commercially manufactured condensed milk, you can’t be certain of the quality of the products or the cleanliness of the process.
- It’s less expensive to make it yourself.
- Sugar is a natural preservative, making home canning easier and safer and extending shelf life beyond two years.
- If you have dairy animals, this is an excellent use of surplus milk.
- Have I mentioned how incredibly easy it is to make?
So let’s get to it.
Supplies
- A heavy-bottomed pot
- A wooden spoon
- A sterilized glass jar with a sterilized lid and seal
- A traditional water bath or pressure canner
- Canning tongs and a jar lifter
Ingredients
(It is very easy to double or triple this recipe; feel free to do so.)
- 2 cups of milk (whole, 2%, and 1% will all work; I used 1% because it is what I had on hand)
- 1 cup of Sugar (My research suggests you can use honey or even maple syrup in place of sugar. I used ordinary, everyday sugar.)
- 3 tablespoons butter (Optional. If you want a lower-fat product, skip it; if you choose to include it, it has to be real butter—no substitutes.)
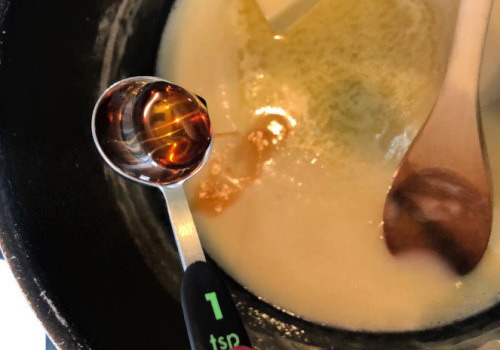
- 1 teaspoon vanilla (Optional.)
Related: How to Make Apple Cider Vinegar
Recipe
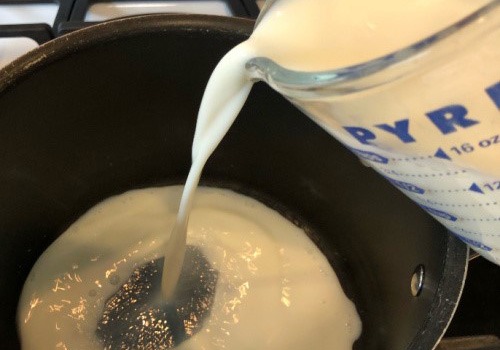
Add 1 cup of milk to your heavy-bottomed pot.
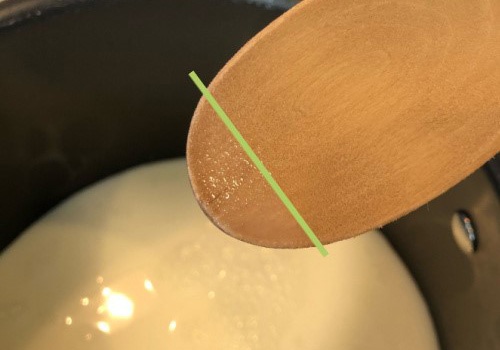
Measure the height of the milk in the pot using a wooden spoon.

Note where on the spoon the milk rises to.
Add the remaining milk to the pot.
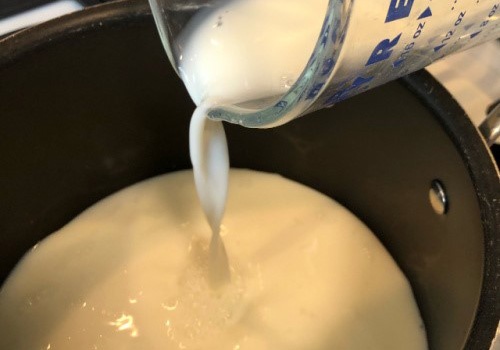
Add the sugar to the milk.

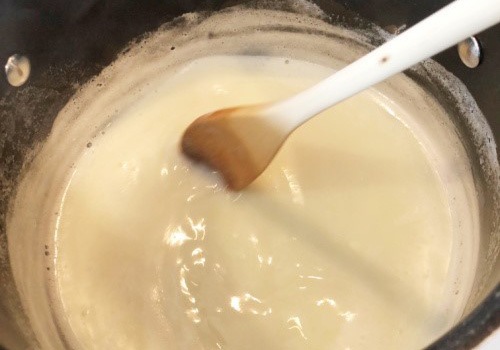
Over a low flame, carry the mixture to a low simmer. (I set my gas stove top to just below “3”.) To prevent the milk from scalding, stir frequently on low heat. As you let the milk simmer, there will be this aromatic heavenly scent across your kitchen!
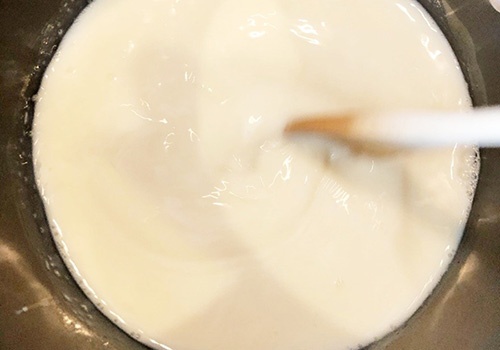
Remove and discard any skin that forms over the mixture while simmering. (This was not an issue for me; my milk and sugar mixture did not form a skin.)
Remove the pot from the heat when the milk and sugar mixture reduce down to the level you noted on the spoon. (This took about 40 minutes for me.)
Add the butter (if using) or some vanilla (if you wish) and stir until it has melted completely.
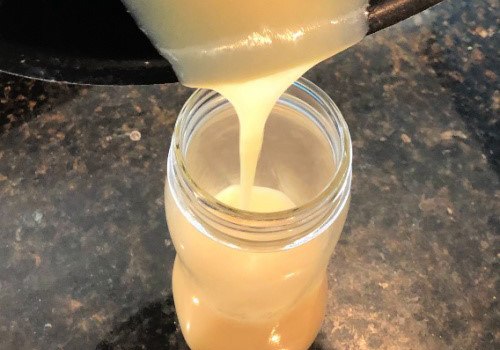
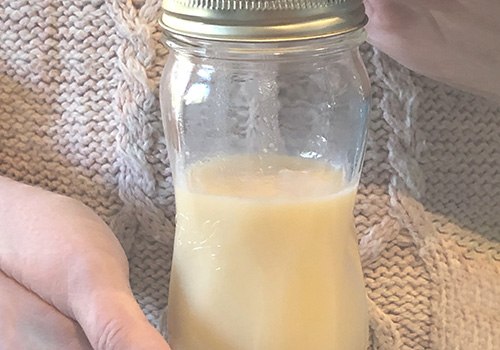
Allow the mixture to cool, and then pour it into a glass jar.
Seal it close. (Eh. My jar is a little too large, but I’ve never been good at estimating volumes. You’ll want no more than about a half-inch of ‘headspace’ at the top of your jar for both water bath and pressure canning.)
(The color of the milk will have changed slightly and will be a creamy, slightly caramel color.)
Storage
(A water bath canner is an alternative because for a significant period of time the milk has already been simmered, long enough to kill any bacteria.)
Place the jars in your canner or pressure canner and fill them with the amount of water recommended by the manufacturer of the canner (usually 2 to 3 inches above the top of your jars). On the hottest burner, place the canner on the stove and turn the burner on to medium heat.
Bring the water to a fast boil and cook your milk for 25 minutes for quarts or pints for 20 minutes.
Before storing, remove the canner from the heat, remove the jars, and allow them to cool fully.
Related: Canning Tips for Beginners
How to Make Evaporated Milk
The method for the production of evaporated milk is almost the same as that for the production of condensed milk. The key difference is that the only ingredient in MILK is (skip the sugar, butter, and vanilla).
By combining 1 part milk with 1 part water, evaporated milk can be reconstituted.
It’s a wise step to have your own homemade condensed milk (which is ridiculously easy to make) in your Prepper Pantry. Not only is condensed milk nutritionally a healthy option, it’s multi-purpose and cheap to produce.
But what makes it extremely beneficial for those wanting to be prepared for potential incidents that are still uncertain is that it is exceptionally long-lasting, needs no electricity for storage, and does not need to be protected from moisture or pests.
It may just be the ultimate DIY prepper.
Related: My First Batch Of Canned Cheese
What do you think? Are you going to try making long-lasting condensed milk of your own? Have you used a different milk preservation method? Share it with us on the comments.


