


Potatoes are food which is low in acidity. It’s important to be aware that using pressure canning is the only effective method for canning low acid foods.
Make sure your equipment is nice and clean. Here are the items which you may need to can your potatoes:
- Jars
- Potatoes
- Salt
Step 1
The first step you’ll take is to have a nice wash for your bottles. You’ll need your bottles to be sterilized. This will purify your jars to get rid of any bacteria. Sterilize the bottles by dipping them in soapy hot water.
When your jars have been washed and sterilized, you may want to move on to cleaning and sterilizing your jar lids.
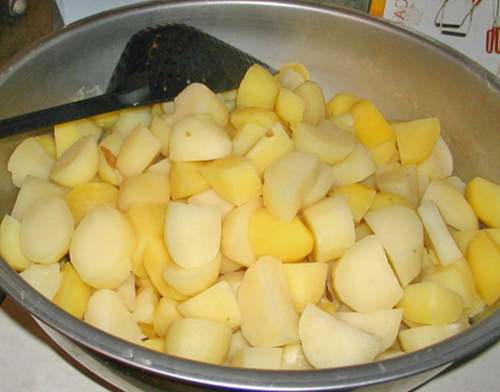
Step 2
Prepare potatoes.
Give your potatoes a quick wash. Then peel your potatoes and slice them into dices.
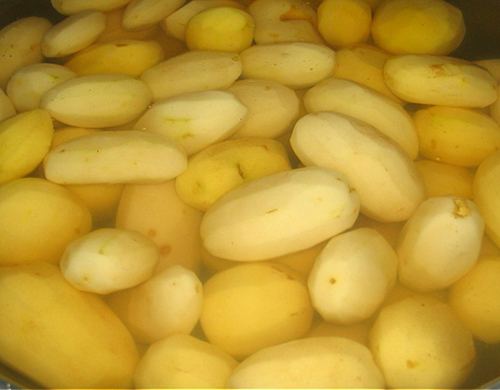
Step 3
Fill your pot with cold water. Then put your potatoes on the ring and start cooking. Make sure you are cooking them up until they’re almost cooked. For that, you’ll need to test them with a fork. While cooking, add a bit of salt too.
Step 4
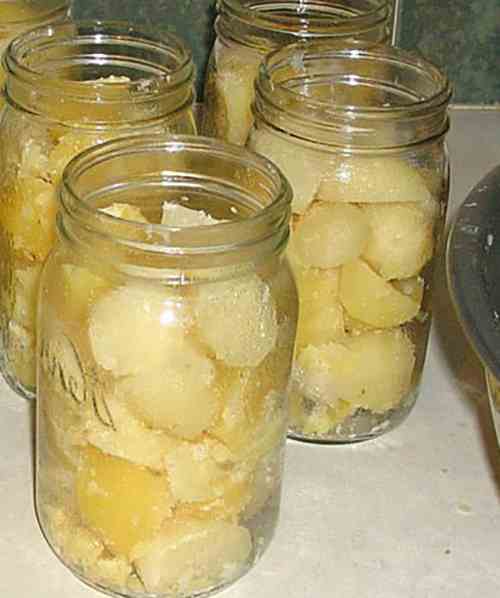
Once the potatoes have almost cooked, the cooker has to be switched off.
Drain your potatoes, and put them in your jars.
Place the potatoes over the pot on a sieve, and let the water drain from the potatoes for five minutes.
Related: How Do You Know if a Canning Recipe is Safe
Step 5
While waiting for your potatoes to drain, what you need to do is sterilize the jar lids in hot water for about five minutes. You can also steep the jars in hot water while you wait, make sure the jars (or lids) do not contain any bacteria before you put the potatoes in.
Let your jars dry out on the outside before bringing the potatoes inside. Give the jars a good towel pat, so they don’t get slippery on the outside. The next step makes it easier for you to work.
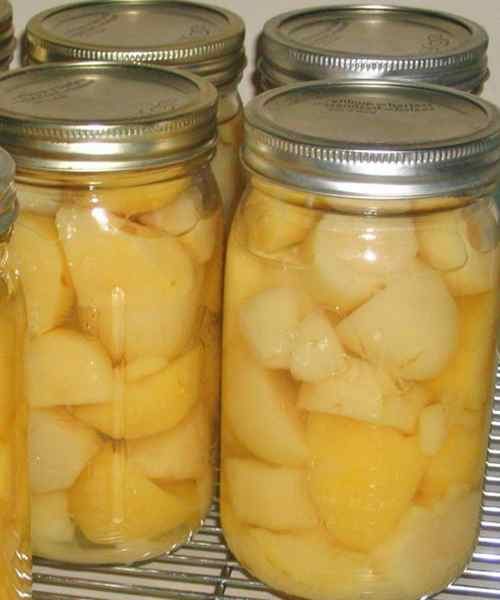
Step 6
The next step is to fill the jars.
First, place the potatoes inside the jars, then add the water. That’s one clear reason. Don’t fill the bottles up to the rim with water. And add a touch of salt inside the bottles. wJust one pinch will do.
Keep the lids and jars warm until this point. Using a towel to cover your palms, while handling the bottles.
Step 7
Air bubbles will build up at the top of the jars, you need to remove those air bubbles before sealing the jars. The easiest way to remove the jars is to use a plastic spatula.
Next, the jars’ rims need to be clean. Secure the jars’ rim with either a towel or some paper towels. If you are using a towel or using paper towels, make sure the towel or paper towel is moist.
Step 8
Open the bottles by screwing the pot lids. Do not seal them too tightly, as you can not open them up. Just tight enough to keep the potatoes fresh.
Step 9
Place your cans in a pressure canner for 10 minutes. Place your jars apart by several inches, so they don’t touch each other. You can put the timers on your canner, once you see the steam coming out of the canner.
Place the weights on top as you close the vent on your canner. Then, let the pressure in your canner build up.
Step 10
Turn down the heat and place your canned potatoes in your pantry.
You can get unwell or even worse by not canning your potatoes properly, it could be careful. So, can your potatoes with caution. Don’t miss out any steps in the process.
The water you fill with your jars shouldn’t be the same water you cooked with your potatoes. The water you cook your potatoes in is going to have too much starch in them.


")


