


If you want to live in a post-SHTF world, what do you need to know?
By referencing abilities that were common among our forebears living in the 18th century, this article will address the question. But I need to talk about the 18th-century survival mentality before I send you a list of skills you need to learn.
You’ll always hear someone say people are soft nowadays. And that we couldn’t live on our own out in the wild. In fact, as it relates to mentality, that may be partly valid.
You certainly know more than you understand about living, but do you have the correct mindset?
The lack of information about how to survive is true. What I see today, though, is a loss of common sense, a lack of audacity and a lack of initiative.
Home Alone
People of the 18th century didn’t have the illusion that anyone else was on the way to rescue them. They were on their own and knew that they were responsible for their survival.
Related: 13 Skills to Learn Now for Survival Later
Common Sense
The people of the 18th century lived by common sense. It is possible to consume any mammal, including dogs, cats, snakes, and even bugs.
Common sense is rarely implemented by modern people. Believing that there’s nothing to do if they don’t have access to new solutions.
Let’s say you have to treat a cut, but don’t have an antiseptic? In order to sterilize and cauterize the wound, what about whiskey, salt, bleach or even a searing hot piece of wire?
Lack Of Daring
If you can just do what you have been told, in a world where you can’t call someone or Google for a solution, you’ll be in for a tough time.
Lack of daring, in my opinion, applies to doing something no one has told or shown you. Can you find a way for you? Can you figure something out? Everything about discovering a way where none actually exists is a pioneering spirit. There is a need for a willingness to keep struggling but still keep trying.
Absence Of Initiative
The people of the 18th century understood that no one would come to save them. They knew that their obligation was to live, and, as such, did not wait for orders.
Nobody was there to tell them what to do. People of the 18th Century had to seize the initiative and take responsibility for themselves.
When you freeze to death or have nothing to eat, it is your fault. It’s important for you to set the ball in motion.
18th Century Skill Set
Here are a few tips about what to learn or have for any prepper.
1. A Practical Walking Staff
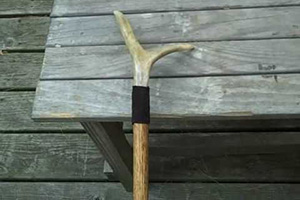
You have got to have a walking staff. The most realistic solution is a staff that on one end has a sharp point, and on the other a Y shape. This is the most beneficial workforce possible.
Firstly, as a defensive tool, both the sharp point and the Y-shaped end will serve to defend against both humans and animals.
With the Y segment, animals that have been injured or stuck can be pinned to the ground.
It is possible to push the sharp end into the ground and use it as a tent pole. You can also force it into soft soil and hang it on the Y portion with a satchel or small bag, keeping food or clothing off the ground.
The staff may also be used as a shooting stick when hunting, or sit against a tree and covered with a camo cloth In order to make a small shelter or hide.
If you need to alert someone, your walking stick can be used as a flagstaff. Another practical application is as a crutch that, in the event of a severe leg injury, will support your weight. In order to support full weight, a cloth wrapped around the y-section would allow the stick to be put under the arm.
Around 1″ to 1.5″ inches is the perfect thickness. Just below your arm is the perfect height. (If you want to use it as a shooting stick or crutch.) To harden the sharp end, fire can be used.
2. Estimating The Time Till Sunset
You must know how much time you have before it gets dark if you are out in the wilderness.
Using your hand at arm’s length, palm facing you, is the safest technique. It is necessary to keep your fingers horizontally. Now, count the number of hands/fingers between the horizon and the sun’s bottom.

It’s about an hour for every whole hand, and 15 minutes for every joint. As the time of year and width of hands vary, this is just a rough approximation.
But still, if the sun is above the horizon with two palms and two fingers, you have around two and a half hours before sunset. Just to be safe, I’d work for two hours.
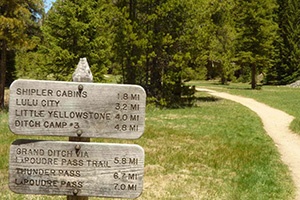
3. The Distance You Can Cover In An Hour
On a flat surface, along a reasonably well-maintained path, the average person can walk between 3 and 4 miles per hour.
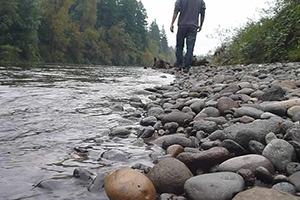
Forests, mountains, deserts, and even alongside the sea on the beach will be slower going. Thick forest or rocky mountainous terrain can slow you down to between 3/4 to 1 mile per hour.
Use this in conjunction with estimating time till sunset when moving around outside.
Related: Edible and Non-edible Mushrooms you Find in Forests
4. Maintain Direction While Walking In A Forest
I write this assuming you don’t have a compass, GPS, or watch and you don’t have the sun to navigate through. It is more difficult than most people believe to maintain direction when you can’t see the sun and have no navigation equipment.
It’s unlikely, some would claim. But this is the best advice if you have to try it.
Don’t have faith in your inner sense of direction. Have a sound plan based on reason, instead.
Method 1 – Marker To Marker
Try moving from marker to marker. Gauge the direction in which you would like to travel. Look ahead and locate a tree, rock, or landmark on which to concentrate. Walk to the landmark or tree.
Then mentally trace a line and define a new focal point ahead, using your starting position and current position.
This will be sluggish and slow, but it will keep you in a straight line. To help you maintain a straight line, you can use broken branches at your starting point and waypoints.
Method 2 – Navigate With Moss
Using moss to navigate is another way of doing this. Moss grows on the north side of the trees in the Northern Hemisphere. This will keep you going in the direction you want to go in.
The main growth of moss on trees must constantly be on your right-hand side, etc., if you want to go east.
Related: 10 Trees Every Survivalist Should Know and Why
Method 3 – Use The General Slope
This will work on the mountains and also only if you know the general lay of the land.
You can walk more or less in a line or general direction whether you follow the slope straight up or straight down.
Walking horizontally along a mountain will take you east-west or north-south, or in whichever direction the range extends, in the direction that the mountain lies. On a round outcropping, do not try this, as you will end up where you started.
If you’re going down, then straight, then you’re moving up later, then down again, the odds are high that you’re walking in a circle or curve.
Method 4 – Passing Left Then Right
The last technique is at best speculative, but can prevent you from walking in circles. The idea is that there will always be a tree directly in our path when walking in a forest.
You will trace a circle if you keep passing to the left of every tree in your direction. But, if you alternate passing trees roughly lying in your path to the left and to the right, you’d trace a straighter line than passing any tree on the same side.
The best thing is to use the sun or the moon or large visible beacons to try and navigate.
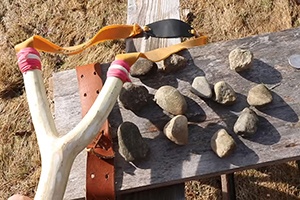
5. Sling
This easy-to-make object can be used to propel stones at high speeds very effectively, and can be used to hunt birds and small animals.
David assassinated Goliath in the Bible with the sling he used to drive predators from his herd of sheep. A sling is easy to make.
You Will Need
It is possible to use a length of rope or twine, sometimes even animal hide can be used. It will fit best for a length of between 4 and 6 feet.
In order to keep the stone, you’ll need a leather patch. The patch size should be about half the size of the palm of your hand.
Next Steps
Cut the patch into the shape of an oval. Then slice two narrow slits close to the oval’s thin/sharp ends.
Run the rope through the patch’s tow slit, placing the paths approximately in the center. On one end of the rope, you need to tie a loop. To insert your last two fingers through, make sure the loop needs to be wide enough.
How To Use
You put your two fingers through the loop to propel a stone and place the other end of the rope in the same hand. Make a fist now and keep the two ends close.
Then enclose the stone (rope on the outside, stone cradled inside) inside the patch and then slide the patch until it is in the center of the rope (The furthest position possible from your hand.)
In a circular motion above your head, you can now begin swinging the rope. Open your hand to “Fire” just to release the loose end.
Aiming with the sling involves a few instances of letting go of the rope before the stone points in the direction you want it to go. This will require you to practice.
Lastly, you don’t have tens of times to twirl the sling. Keep it in motion until the object you want to throw is located. Speed the sling up vigorously until you have it spotted, and release it. Two or three overhead spins should do it.
Trial And Error
Finally, for the first time, when your life depends on doing it right, it’s never wise to field test skills. Whenever the chance presents itself, strive to bring the above into effect.


