


Although I have never been or never wanted to be a killer, much of the success of my life has been predicated on keeping a set of sharp knives of razor. Again, I’m not an assassin, but I like to cook. It is of utmost importance, on the hot line and in food preparation, that you have a properly sharpened device to do the job. These blades become the most important part of your success when a day’s work consists of filleting whole salmon and slicing herbs so fine they are hardly recognizable.
In a case of survival there is no difference. The blade is the important tool in your kit, by far. I’d argue that its only rival would be a powerful water filter. Still, you can create a filter from different materials with a knife but you can not create a knife with a water filter. Let’s move on.
Tools
1. Wet Stone
In order to sharpen any blade you are going to need something that will work the edges of the blade back to a sharpened edge. The wet stone provides you with a smooth surface that wears down slowly on each side of the blade until you sharpen your edge.
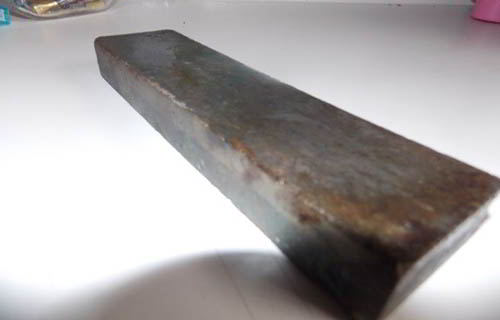
My Japanese Wet Stone
When buying a water stone (must be kept 40min in water before), look for a large one, at least 2.5 inches wide by 8 inches long, and an inch in thickness. I recommend keeping two stones in your kit. One with a medium grit (around 800 or so) to perform major sharpening jobs, and one with a fine grit (at least 2,000) to tune the edge to a razor-sharp finish. (J. Kenji Lopez-Alt)
Related: Alternative Weapons For Survival
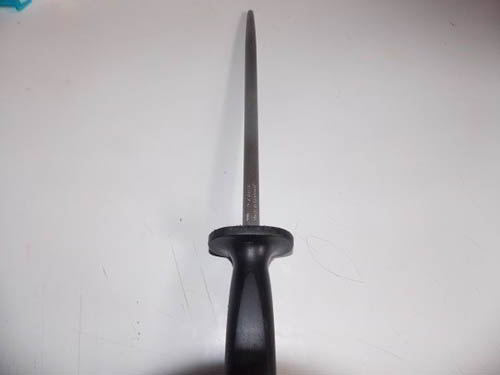
2. Honing Steel
A versatile tool that aligns and hones the blade on a knife with honing steel. In many cases, an unsuccessful knife can be brought back to life with several swipes on a honing steel instead of shaving away at the metal to create a new blade.
A tool used more frequently in kitchens is a powerful and effective way to maintain a strong blade.
The Method:
Step 1
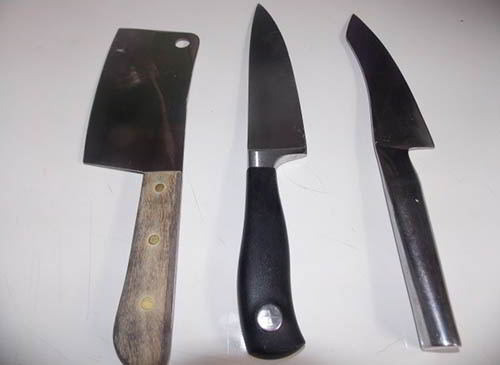
Your first step is to get a feel for what your blade wants. Once I sharpen a blade, I first look at the knife as a whole to determine how best to handle it, what the blade shape is, and how best to deal with the issue.
Step 2
Some blades curve, other blades are flatter, and all this determines how you sharpen the blade. You will need to make sure that every part of the blade hits your moves on the ground. You could wind up with a blade that is razor sharp at one end and dull at the other if you aren’t careful.
Step 3
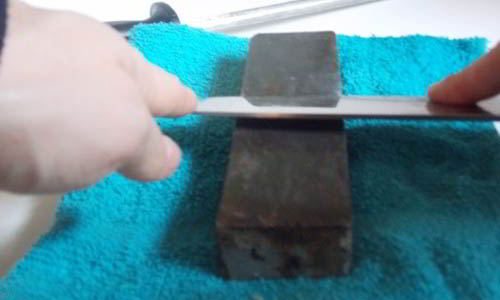
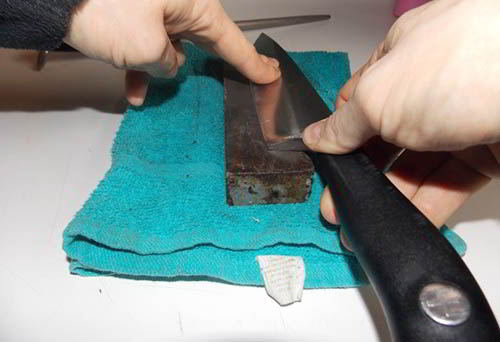
Lay out a towel or something that will hold stone in place so it doesn’t shift as you begin to run the knife blade across it.
Step 4
Now before we even start to sharpen a blade I run it across the sharpening steel in a descending manner on both sides. Hold the knife at a 45-degree angle to the blade. I start with 3 swipes on each side of the blade and decrease down to 2 and then finally one swipe on each side. From doing this you will either find the blade has been realigned and is much sharper or it’s still dull. If your knife doesn’t spring back to life than it’s time to sharpen it.

Step 5
Run the blade across the stone in a perpendicular direction to the stone itself. Start with the widest part of the blade and work your way up to the point sliding forward and sliding back.
The first factor effecting edge sharpness is the angle it is sharpened. The lower the angle, the sharper the blade becomes.
However, the lower the angle, the weaker the edge becomes. A 22.5° should be perfect in most cases (see picture). But when choosing the angle you may take into consideration the hardness of the steel. (Source)
Step 6
After three trips up and back on the stone it is time to do the other side. Leaving the stone stationery you need to flip your knife over keeping the blade facing away from you. And continue with the same method.
Step 7
At this point use the honing steel with the method used above before sharpening the blade.
Step 8
If the blade is sharper then you’re fine to go! If its still dull repeat steps 6 and 7 until your blade is fully sharpened.
If you’re dealing with a well-worn blade, you might need to use another method before you take the gentle approach. I learned this technique from a Belgian chef. I had an old chef knife that had taken me through a variety of activities and was worn down pretty well.
Before checking the blade and going back, this chef ran the knife blade parallel to the stone, and did about 20-25 hard strokes on each side. This old man literally created a new blade on my knife using the stone, and I was very impressed. Now it didn’t look pretty but that knife was brought back to life and I still use it some 10 years later.
Often it helps to cover the edge with a permanent marker so that you can see where you have steel removed. You can see here that you are keeping an angle too high to match the angle already on the knife. Note that the permanent marker is removed from the edge but not from the top of the secondary. Slightly lower your angle, and check again. The other problem: too shallow of an angle (see picture).
Related: These 19 Early Pioneers Tools Are Still Working Today
Fine-Tuning
The leather is the final instrument in the sharpening process. You may use a leather belt which is plain vintage. Basically you can do the same thing barbers used to do with razors.
The leather polishes those little microscopic teeth off, so you end up with an edge just like glass.
The angle doesn’t matter as long as pressure is used, because the leather is very smooth.
Notice that you don’t drag the edge across the leather as before … that probably would cut your belt up.
How to Test Your Knife’s Sharpness
First, “normal sharp” depends on the use of a tool. Normal sharp:
- For a kitchen knife – should be able to cut vegetables with almost no downward pressure;
- For a woodworking tool – the tool should cut wood fibers cleanly without leaving marks or crushing the wood fibers;
- On a fillet or skinning knife – it should be able to cut very quickly without having to saw through the meat;
- But a Survival Knife has to pass all these tests;
If you really want to test your survival knife, you have to get down to fine-tuned levels of sharpness. And here are two tests you can use.
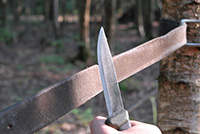
 Take a piece of paper and hold it vertically. If you try to cut it with a dull knife, the paper will crumple beneath the knife. A sharp knife will cut it cleanly when use a slicing motion to cut through the paper. A razor sharp knife can cut the paper cleanly by just pressing down on the edge of paper without any slicing at all.
 Take a piece of paper and hold it vertically. If you try to cut it with a dull knife, the paper will crumple beneath the knife. A sharp knife will cut it cleanly when use a slicing motion to cut through the paper. A razor sharp knife can cut the paper cleanly by just pressing down on the edge of paper without any slicing at all.
- Another test is to shave the hair on your arms. A dull or even moderately sharp knife will just fold over your arm hairs without cutting. A well sharpened knife will cut almost all the hairs in one pass. A “devil” sharp knife will cut all the hairs in its path. This level of sharpness can only be attained using the finest tools. (source)
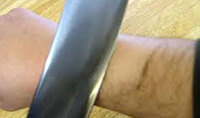 Another test is to shave the hair on your arms. A dull or even moderately sharp knife will just fold over your arm hairs without cutting. A well sharpened knife will cut almost all the hairs in one pass. A “devil” sharp knife will cut all the hairs in its path. This level of sharpness can only be attained using the finest tools. (
I also urge you to invest in a honing steel and use this versatile tool before you try to sharpen an edge right away. I brought back rusty knives from the dead by just honing the edge. This will save you time and resources that can be spent elsewhere in both.


