


It seems like every time I go shopping, due to the worldwide pandemic, there is another hot item that is incredibly difficult to locate, if you can find it at all. On my “grab it if you see it” list were products such as bathroom paper, paper towel, canning supplies, and assorted foods such as meat or bread.
So it’s no wonder, then, that more and more people are trying to make things at home from scratch. I was all excited to demonstrate how to make homemade bread to my young teenage grandson, who is interested in cooking and baking. A quarantine advantage, if there is one!
But, my thoughts were obviously not special as there was a scramble for even more products, making the above list grow longer. A shortage of bread, coupled with boredom while stuck at home, resulted in shortages of homemade bread making ingredients that I was so eager to create.
Like yeast. Each time I tried it, the local stores were out of it. And the rates were crazy for what I could find online. I figured out, then, that I could make my own!
Related: 59 Long-Term Survival Foods and Supplies from the Grocery Store
I also found that cultivating a homemade wild yeast starter has a few more advantages than simply having it on hand, such as the following:
- More natural
- Less processed
- Inexpensive to make
- Easy to make
Moreover, with a natural yeast, many individuals find that their sensitivities to baked goods are less serious, rather than one purchased with additives at the supermarket.
One of the best ways to get your own starter is to grab a scoop of a friend’s, and then feedn it. Later in the article, I will discuss feeding. If you don’t know anyone who has a starter, though, or if you just want to start your own from scratch, it’s pretty easy and doesn’t cost a lot at all.
So, let’s start off with your starter!
Supplies Needed
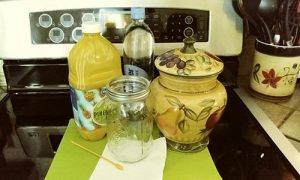
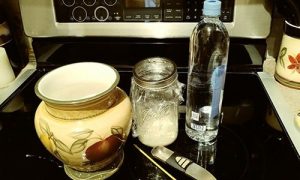
The supplies list is quite short, which is especially good when you never know what items might be hard to find.
Here is what you will need to cultivate your own wild yeast starter:
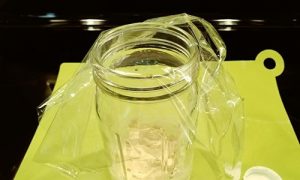
1 Quart Jar
That’s the minimum size and depends on how much you’re really baking in a week’s time. The container should not be airtight, however. Remove the seal if you use a wax jar. Or, do not tighten it if you are using a canning jar with a cap and a lid. A fabric or plastic wrap may also be used to loosely cover the jar while it’s sitting. It is necessary to hold oxygen in, but CO2 must be able to get out.
Distilled Water
Water that is not distilled, or highly filtered, has chlorine in it. Chlorine will inhibit growth and actually kill your yeast.
Flour
For this, you can use any flour. So, it doesn’t matter whether you prefer all-purpose or hard white. If the difference between flours can be differentiated by your palate, then use what you choose for baked goods. Otherwise, just use what is on hand with you.
Related: How to Can Flour for SHTF
Unsweetened Pineapple Juice (Optional)
For the FIRST day, you have the option of using pineapple juice instead of water. But only on the first day. This will just add a little natural sugar to help kick your starter to act a little faster.
The mix of ingredients (flour and liquid) is equal parts by WEIGHT. I add 3 tablespoons of flour, for instance, and 2 tablespoons of water or juice.
Day 1
Add 3 tablespoons of flour to the quart jar.
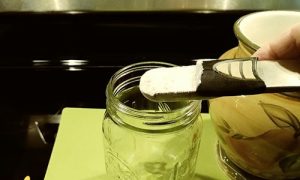
Add 2 tablespoons of water or juice to the flour in the jar.
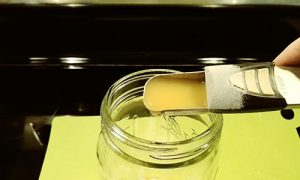
Whisk the flour and liquid together.
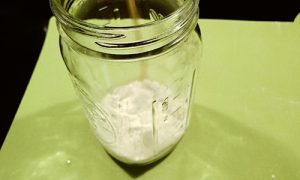
Lightly cover the jar, with an untightened lid, cloth, or plastic wrap.
Set the jar on the counter, keeping it at room temperature, lightly stirring the mix 2-3 times within the next 24 hours.
Day 2
Repeat the steps from Day 1, with the exception of not adding any juice. Use water in place of the juice from now on. The juice is only for day 1, if you use it at all.
Day 3-7
Repeat this process every day, adding more flour and water, and stirring 2-3 times a day. In 3-5 days, you should start to see air bubbles or pockets in the mix through the jar. At this time, you should also be able to smell a yeast aroma.

Ongoing Feedings
After a week, what you do next will depend on how often you bake.
If you bake about once a week, the ongoing feeding should consist of the following:
- Store the jar of yeast in the refrigerator, which will stop the growth, because you have enough now.
- Feed it once a week, by adding equal parts of flour and water by WEIGHT, basically replacing what you take out for use.
If you bake more often than once a week, the following could be done for ongoing feeding:
- Store the starter jar out on the counter.
- If there’s too much in the jar, discard or use half.
- Feed the starter daily with equal parts of flour and water by WEIGHT.
Related: 6 Backyard Plants You Can Turn Into Bread
Extra Tips
- If the starter is not active – If you don’t see an active yeast after a couple of days, consider adjusting the flour. For stubborn starter cases, rye flour is a decent alternative. Or, make sure it won’t be too cold. The house may be colder than usual in cooler months and can delay growth. Store it in a warmer part of the house, if that’s the case.
- Clear or yellowish liquid on the top – This is prevalent, and also known as hooch. Since this is natural, if it’s only once in a while, the liquid can just be discarded. Your starter is hungry if it’s a continuous one, so feed it.
- If the starter is covered with a white’ish colored film on top of a liquid – Feed it immediately, because it’s hangry, not just hungry.
- The starter goes bad – if you notice a bad smell, or see unusual coloring or fuzziness, throw it out and start over.
- If you see fruit flies or maggots in it – Discard the whole batch away and start over. Try to cover a thicker cloth over the fresh batch. Bear in mind, if you have fruit flies around, they love this stuff as much as you will!There are numerous recipes on how to use your starter for wonderful homemade baked goods, either found in your grandparent’s recipe box or on the internet. Enjoy!


