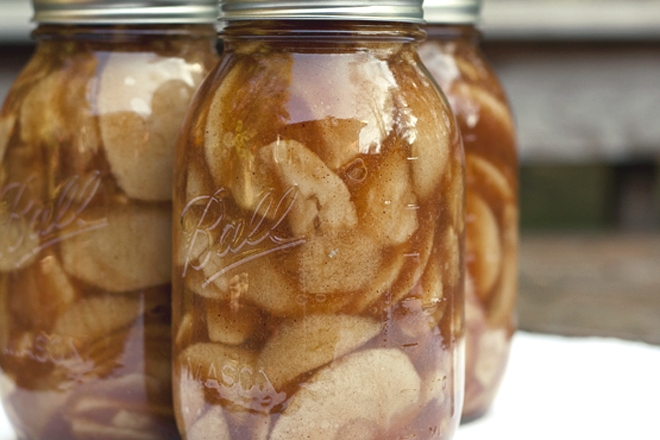
Learning how to can apple pie filling means you never have to buy apples out of season when they cost an arm and a leg, and it also means you can have pie whenever you want. Which makes it one of my favorite pantry staples.
Nothing says fall like a good crisp apple. I love the way an apple fits perfectly in the palm of my hand. The way they perfume the air, promising delectable delights. And it means I get to can up a new batch of homemade apple pie filling in my pressure canner.
Resources for How to Can Apple Pie Filling
My original apple pie filling recipe used cornstarch, but the cornstarch does break down after time and is no longer approved for canning due to safety issues. The jars I use for Christmas baking were fine, but by the time I hit spring, they were a mushy runny mess. They still worked, but the crusts were a bit soggy in the pies.
I’ve now been using ClearJell® both because it’s the only approved canning thickener and because it truly does create a superior end product! Plus, there’s too much precious time and work to waste on a recipe that’s not safe and doesn’t hold up.
Here’s the version I did this year using the Clear Jell®. It makes 4 quarts or 7 pints of apple pie filling.
Want a canning apple pie filling without a clear jel recipe? Simply omit the ClearJell and instead, when you open the jar to bake your pie, add thickener of your choice to the pie filling just as if you were using fresh apples, bake, and enjoy!
Canned Apple Pie Filling Recipe
(Adapted from Ball Complete Book of Home Preserving )
12 cups sliced, peeled, and cored apples
2 and 3/4 cups raw sugar
3/4 cup Clear Jel.
1 teaspoon cinnamon
1/2 teaspoon nutmeg
1/2 teaspoon ginger
3 and 3/4 cups water
1/2 cup lemon juice
Place peeled, cored, and sliced apples in boiling water for 1 minute, working 6 cups of apples at a time. Blanching keeps apples from becoming mushy when canning. With a slotted spoon, place apples in a bowl and cover.
In a large stainless steel pot, combine sugar, ClearJel®, spices, and water. Bring to a boil over medium-high heat (don’t use a hard boil), stirring constantly, and cook until it thickens and bubbles. Add lemon juice and boil for 1 minute, constantly stirring.
Remove from heat and fold in apples. Ladle apple pie filling into warm prepared jars, a canning funnel makes this way easier, let me tell you. Wide mouth works best for this recipe, but narrow can be used.
Leave 1-inch headspace, run a spatula down the inside of the jars to remove air bubbles. Wipe rim with a damp clean towel. Center lid and screw bands down until tight. Place jars filled with apple pie filling in a hot water bath for 25 minutes.
Turn off heat, remove the lid, and let sit for 5 minutes. Using a jar lifter, carefully remove hot jars to a towel and allow it to cool without moving overnight. Check seals, remove bands, wipe down outside of jar and store in out of direct sunlight for up to 1 year.
Altitude adjustment: If you’re 1,000 to 3,000 feet above sea level, increase processing time by 5 minutes (30 minutes total), 3,001 to 6,000 feet above sea level, increase processing time by 10 minutes (35 minutes total).
I have to confess, I licked the side of the syrup pot before washing. We have to taste test right? It was soooo good. When ready to bake your pie, pour one-quart apple pie filling into the pastry-lined pie plate.
Place your top crust, cut slits for steam escape, crimp edges, and bake at 400 degrees for 50 minutes.
What’s your favorite apple or dessert?
Update: I used to pressure can this but without being able to find a tested time for pressure canning, only water bath process my pie filling now.


