


There’s the Biblical reference that bread is the staff of life and we discuss our primary pay being our bread and margarine. Without some type of bread – and it doesn’t need to be produced using wheat flour – we are somewhat lost. Getting new meat and vegetables when you’re progressing and in survival circumstances can be troublesome.
So whether we are in a bug-in or bug-out circumstance, having the capacity to make some new delectable tasting bread will lift individuals’ spirits and give them the sustenance to survive.
Around the globe, individuals have made an arrangement – Mexican tortillas, Indian roti, South African roosterkoek, Scottish bannocks, Italian focaccia or pizza, Arab pita bread – the rundown continues forever. At that point obviously with movements more than a large number of years the first formulas may have been adjusted to the sort of flour that was accessible.
We have gathered together various formulas that range from ones you plan ahead of time and will keep going quite a while to those that you can rapidly make over a fire on a stick, prepare in the coals or cook on a skillet that should be eaten not long after they are made.
In a survival circumstance, you require the base of fixings, a brisk method for making bread on the off chance that you don’t have sufficient energy to sit tight for bread batter to rise – so these are the snappiest formulas to get ready.
1. Bannocks
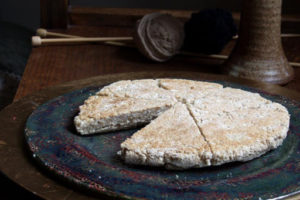
It seems the Roman soldiers were the ones who introduced bannocks to Scotland – then bannock was introduced to the US and Canada – and judging from comments for videos on how to make “native” bannocks people aren’t too happy about it being considered a First People’s staple.
The issue is not who the original recipe belongs to – it’s just about having some carbs when you need them. The type of grain doesn’t really matter, the first priority is something to eat, and you choose what suits your constitution and what is available – whether it’s wheat flour, oats, barley flour, potato flour or some other flour. Adding salt is up to you. If you have health issues leave it out.
If you want to make bannocks into a sweet treat you can add any edible berries that you come across on the trail or have growing in your survival garden and spread on some butter and organic honey when you split the steaming bannocks.
2. Survival bread that lasts for years
Commonly referred to as hardtack or ship’s biscuits in the past this is what was made and sealed in barrels on sea voyages lasting months, carried by soldiers on military campaigns and when people traveled long distances overland.
It may not be the most delicious and you need pretty good teeth unless you are going to dip it in tea, but in extreme survival situations, it will keep you alive. Watch this video to see how to make the ultimate survival bread with only three ingredients – flour, salt, and water.
3. Roosterkoek
Popular in South Africa and Namibia, roosterkoek is simply bread dough cooked on a grill over an open fire. The pleasure is in eating it immediately after it’s been grilled – piping hot the traditional South African way with a healthy dollop of butter and spread thick with apricot jam. It is a great accompaniment to grilled meat and can be used to mop up the gravy from the traditional potjie – a stew cooked in a three-legged pot over an open fire. Watch this video to see how it’s done – they also list the ingredients you will need. It does use yeast to get that real bread taste and texture.
Related: How to Make Your Own Solar Stove
4. Bread on a stick
No oven. No grill. No problem. A campfire, a stick, the ingredients for the dough and soon everyone will have something to eat. How fancy you want to get is up to you.
Basic recipe to make 15 stick breads
2 cups bread or plain flour – as opposed to cake flour
2 teaspoons baking powder
¾ cup of lukewarm water
¼ cup of coconut or sunflower oil
½ teaspoon of salt
Method
Combine the dry ingredients.
Make a well in the center and add the water and oil.
Mix together until ingredients are incorporated.
Dust your hands with a little extra flour if necessary and work the dough for a few minutes until it is pliable and smooth.
Allow it to rest for a few minutes while you ensure the fire is right and you have the sticks ready.
Divide the dough into 15 equal size balls and roll each into a sausage shape then flatten out a bit before winding one shape around a stick, just overlapping slightly.
Hold over the flame, turning periodically until done.
Tips and Precautions
- Willow, hazel, ash, sycamore, birch, bamboo and apple are among those suitable for sticks, but this is by no means an exhaustive list.
- Never use a stick from a tree you can’t identify! People have died from using the very poisonous oleander (Nerium oleander), a common garden shrub, as a skewer. Other trees to avoid are elder, laurel, laburnum, and yew. Pine can give a strange taste due to the resin. If in doubt and you have the room in your bug out bag use stainless steels skewers – they’re a good conductor of heat and will ensure the core is hot so the inside of the stick bread will be done. You just need wooden handles so you don’t roast your fingers too – but they’re easy enough to DIY from bits of thicker twigs if you are really tight for space.
- If using dry sticks remember to soak them first so they don’t burn.
- Kids love preparing these stick bread, but usually, as the competition heats up they want to go bigger. In this case, bigger isn’t better – the inside will remain uncooked and the outside will char – so encourage youngsters to keep the stick breads the standard size that will cook through evenly – they’ll get the hang of it after the first couple of tries.
Variations for bread on a stick
This is where you can get creative.
Butter – Adapt the basic recipe about by substituting one-third of a cup of butter rubbed into the dry ingredients, before adding two-thirds of a cup of water for a softer texture.
Mediterranean – substitute ¼ cup olive oil for the coconut oil and add some fresh oregano, a little rosemary and crushed garlic to the mix.
Spicy – Want to make your bread a little spicier – add some chopped chili, onion and garlic to the mix.
Cheesy – add cheese and finely chopped onion to the dough.
Cinnamon – when the sausage-shaped dough has been flattened out sprinkle on some cinnamon sugar and add a couple of raisins that have been soaked in water for an hour then drained – press raisins into the dough then roll up on the stick with the raisins and cinnamon sugar on the inside (if they are on the outside they will get dry and charred).
Berry – use fresh berries you have gathered and a teaspoon of sugar or honey blended into the piece of dough before shaping and cooking on the stick.
5. Prepper bread
This video shows you how to make prepper bread that can be stored for a long time and takes a minimum number of ingredients, the most important considerations when prepping:
6. Roti or Chipatti bread

With its massive population, India stands out as a country where bread staples are made simply. Anyone thinking of survival bread should be able to make roti, a flatbread that goes well with meat dishes and vegetable biryanis and curries.
It’s easier than Naan bread, which is baked, stuck on the interior walls of a clay oven called a tandoor. For roti all you need is a well-seasoned cast-iron skillet – and you don’t even need to oil it either.
7. Damper
Damper can be cooked right in the coals of the campfire, but if you have a Dutch oven you can do it in there too. In the past travelers would hollow out an anthill make a fire inside, then place their dough in there to cook – but these days there may be concerns about taking over the termite nest and displacing or roasting the original inhabitants.
Ingredients
- One 500g packet of self-raising flour – this will be just over 4 cups (or 4 cups plain flour with 4 teaspoons of baking powder)
- ½ a teaspoon of salt
- 1 ½ cups fresh milk – or you can use powdered milk mixed with water if you’re out camping without access to fresh milk
- 1 heaped tablespoon of softened butter or margarine
Method
- Empty the flour into a bowl, keeping a heaped tablespoon of flour aside.
- Stir in the salt.
- Use your fingers to rub the butter into the flour until there are no lumps of butter.
- Add the milk and mix.
- Sprinkle ½ the tablespoon flour onto a board or sheet of parchment on a tabletop and dump the dough mixture on it.
- Form into a circular loaf shape that will fit comfortably in the size of Dutch oven you are using.
- Use the other ½ tablespoon of flour to sprinkle on the top of the loaf
- Use a knife to score the loaf – either cutting slits around ¼ to ½ and inch deep or three diagonal slits across the top – it not only makes it look good it has a useful purpose in controlling the direction the loaf rises in the oven instead of allowing it to burst as it rises.
- Put the lid on and bake for around 30 minutes.
- Test with a skewer to see if it is done.
- For the last 10 minutes, you can bake without the lid on to get a browned crust.
8. Pot Bread – Three Ingredient Cornbread
This is a recipe I have used a lot on camping trips to out of the way places where there are no shops and fresh bread is unavailable. It’s so popular we even do it at home. You will need a Dutch oven if you are baking over coals or you can bake in conventional loaf pans in an electric oven or gas oven. The yeast in the beer helps with the rising process.
Ingredients
- 1 standard can of beer
- 1 standard can of sweet corn (415G)
- 1 packet of self-raising flour (500g)
(The standard can varies from country to country you need 330ml – the smallest standard can but if you’re in a country that has the 355ml or 375ml standard cans reserve a little– as the cook’s bonus)
Method
- Open the can of sweet corn and pour into a bowl
- Open the beer can and add to the sweet corn.
- Stir in the self-raising flour reserving one tablespoon.
- Line your Dutch oven with parchment so it comes up the side (it will make your completed loaf easy to remove), sprinkle the base with the tablespoon of flour, scrape in your mix and cover with the lid.
- If you’re using a conventional electric oven or gas oven preheat to around 350 degrees Fahrenheit, line your loaf pans as above and add your mix.
- If you are placing in a hole in the ground make sure your coals are glowing red on a nearby fire, place a 12 centimeter or so layer of coals in the bottom of the hole, add the Dutch oven and place a layer of glowing coals on the top. You may need to keep adding to the coals from your wood fire to ensure the heat is retained through the cooking process around the sides of the Dutch oven.
- If you are using a wood-fired pizza oven make sure its got plenty of power and place the Dutch oven on a layer of coals, put some coals on top and ensure there is still some wood burning on the sides to keep the heat going.
- Test with a skewer – when it comes out clean the bread is done. This should take around 40 minutes or so depending on your heat source.
- Remove and allow to rest – it can be quite crumbly so don’t try to cut it immediately.
9. Pita bread
If you love pita pockets filled with all the yummy bits like shredded lamb and quinoa, corn, avocado – whatever takes your fancy then watch this video to see exactly how to make this delicious near Eastern version of bread. The video shows an electric mixer but you can do this by hand out in the bush. All you need is your trusty cast-iron skillet and a campfire and soon you’ll have those little air-filled pillows of deliciousness tantalizing everyone within range of the fire
Related: Best Survival Real Estate Agencies
10. Tortillas
Want to make burritos, wraps, and tacos? You can use all the good stuff from your survival garden for the fillings.
What if no yeast is available?
In extreme situations, you may not be able to get to the shops to stock up on commercial yeast. This article explains how to cultivate your own starter. Some families have kept their starter going for years!
There are hundreds of variations on bread out there for those who need something to survive on when the going gets tough. As with the early pioneers in America, it is important to stock up on plenty of flour and oil before SHTF situations. As long as you have these with fresh clean water and a heat source you can keep the family fed.
Baking powder and yeast as leavening agents are nice to have but not absolutely essential in extreme situations. If you expect to be on the move then hardtack will keep you sustained until you can reach your bug-out or bug-in location where you should have your supplies stored.
In the meantime, it’s fun to experiment with bread that has kept millions alive who don’t have electricity yet can produce bread often far more delicious than modern bakeries with electric ovens.


 That Can Help With Your HBP")


