


Men and women knelt over fires long before we had pots and pans, and used what nature offered to bring food on their table (or on the large rock that served as their table that evening). We have knives, pots, spoons, and even large appliances such as food processors, today. But this does not mean that you will never have to know how to cook without them. Whether you’re camping or in an actual emergency situation, there are 7 common primitive methods of cooking that you’d still know better even today.
Ash Cooking

This is much like what we call tin-foil cooking. The difference is that instead of using aluminum foil you will be using leaves.
You first have to make a fire gradually let it die when flattening a fire’s surface with coals. Coals should be hot (with flames) but not burning any more.
While the coals get heated, find some very large leaves that can be used to cook the food inside. Remember the leaves need to be large enough to wrap around the food, but they also need to be non-poisonous so you don’t ingest toxins.
Related: How to Dry Can Beans and Rice for a Shelf Life of 20 + Years
Bonus points if you also find edible leaves. Also, try to find leaves or plants that have vines attached to them. These work well for wrapping around the food and turning it into a little bundle.
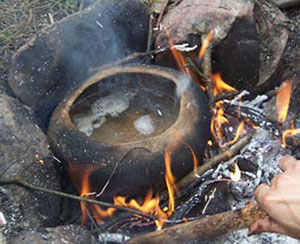
A very common and very good example are burdock leaves (see picture above). These leaves are huge, and they’ll produce a delicious juicy meal.
Once the food is wrapped and the coals are hot, place the food onto the coals. Using a stick, move some hot coals over top of the food so that it can cook on both sides.
Broiling
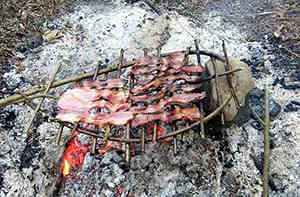
Broiling over a fire doesn’t so much vary from broiling in your oven.
The only difference is that you may not have a pan over a fire to put the food inside, so you need to set up something that can keep the food over the fire without it falling in.
River birch and willow are great woods that you can use to broil over an open fire because they are stable and stability is important when trying to find the right type of wood for this kind of cooking. You may also need a few pieces of the same type of wood; the more you have, the more efficient your cooking appliance will be.
Start by bending one piece of wood into an oval and crossing the bottom of the oval with another straight stick (think of an upper case D) to construct your “broiler.” Using small twigs or vine to tie the oval-shaped wood onto the straight handle, but the top piece can be extended so that it extends down the entire straight wood. If you want to make the wood even more stable, then add smaller pieces of wood over the two pieces of wood. This will help the food and also allow you to move the wood up and down to fit specific pieces of food, if you are handy enough.
Once you’ve set up your “broiler,” you simply have to attach the food to it. If you cook fish, you can do so only by cutting the skin onto some wood, and you can simply lay it over for larger parts. Then just hold the broiler from the flame for several inches to keep it from burning, and keep it flat to keep your food from falling in.
Hot Stone Cooking
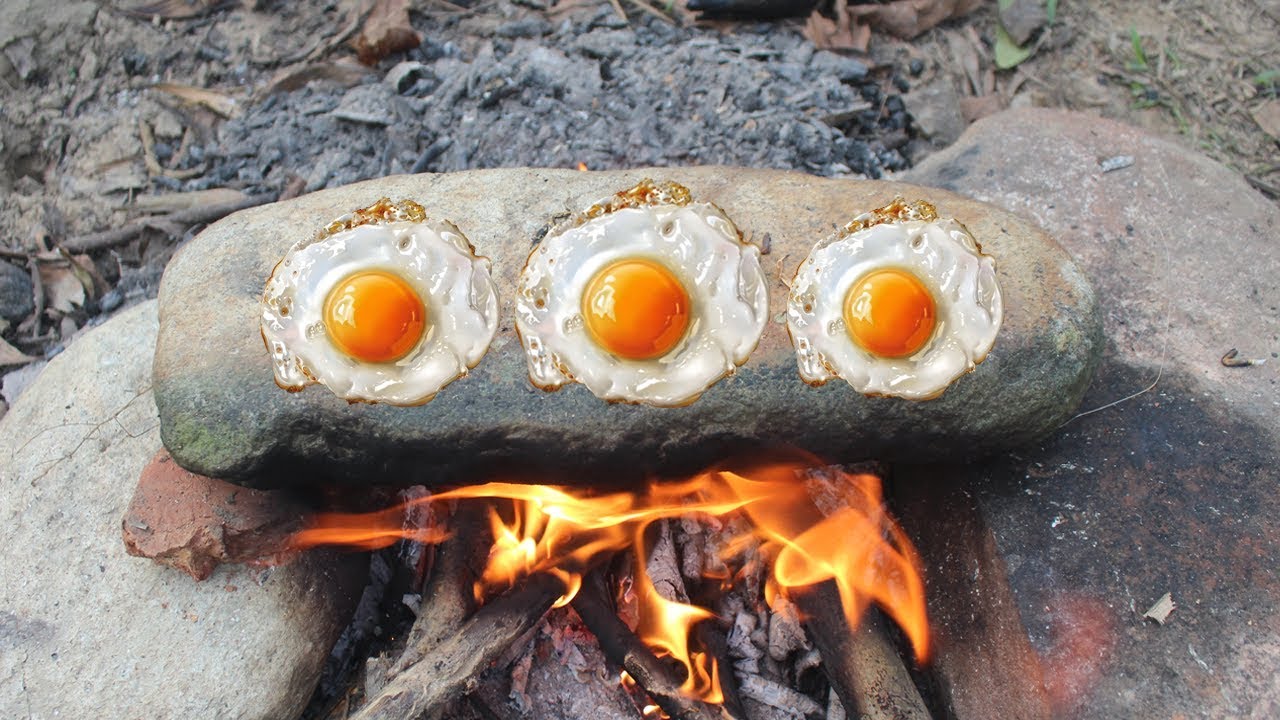
Cooking on a hot stone really is nothing but cooking in a frying pan. You just have to heat it up using a flat surface like a rock, place your food on it and then heat it up a bit more. Make sure the rock is dry, so it heats up faster, and that it has at least one flat side to keep your food from falling away. Give it a quick cleaning by dusting it off with a cloth and make sure it is thicker than one inch, so when heated to extreme temperatures it doesn’t crack.
Either of two ways you can cook them with stone. You can either use a small stone for a single serving, or use it to cook larger quantities or larger pieces of food to place many stones over a low and wide fire. You’ll need to let the stones heat up for at least an hour for a larger area, while you can possibly get away with just a single stone with fifteen minutes or so.
Place your food on it once the stone is hot and just wait for it to cook through – the time it takes depends on what you’re cooking, and your own taste preferences. Remember that once the food has finished cooking, remove the stone entirely and hold the food on it, using it as a plate or platter. The stone will cool down for at least half an hour so it will keep your food nice and hot for you.
Related: Essential Prepper Skills For The Wilderness
Plank Cooking
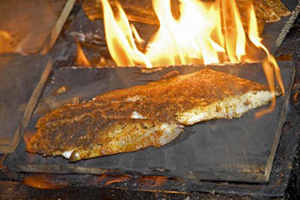
Unless you’re able to find a smooth piece of wood in the forest (which will possibly prove to be difficult), you’ll need an axe or a saw to create cooking planks. Next, know what kind of wood you want. Don’t use anything toxic, and don’t use wood like conifers that can have a strong tasting resin that can flow into your food. Some of the best woods for plank making are poplar, cedar, and oak.
Find a piece of wood you think is going to make a nice plank. If you find a small log, cut it in half and then, placing it on the flattest side, cut out planks about 9 inches in diameter from it. You can also use two planks at once, allowing one to hold the food while the other is holding up the other, away from the fire and burning. Some people choose to put pegs on their board, wedging them in holes that are cut with a knife. This extra phase isn’t required though, because you can just leave the board lying flat, and the food will stay there.
Related: Bushcraft Skills For Surviving in The Wild
Steam Pit Cooking
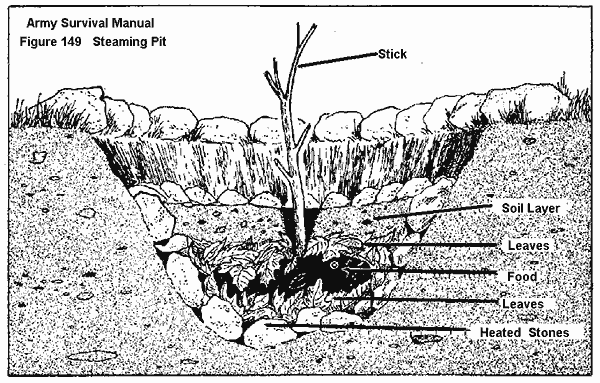
Steam pit cooking has been used for centuries as a method of survival cooking. You have to start by wrapping the food in large leaves, just as you do when cooking ash, and then you need a place where you can build a pit big enough to hold the food and the coals.
Make sure that you make it at least one foot to two feet deep when digging the pit. This will be big enough not only to hold the food but also to ensure that no steam escapes during cooking. Once the pit is dug, line it with charcoal at the bottom. Light the fire, just as you do when you cook ash, and wait until it gets really hot and then dies down. Then put the food over the coals and cover it with the soil you dug up. Allow it to sit for at least a few hours (even little food will take some time to cook this way), then dig it up and dig in!
Spit Cooking

If you’ve ever checked out a whole chicken that spins slowly on a rotisserie, you’ve already seen first hand spit cooking. There are both horizontal and vertical spits and if you want the teeth-equipped metal rods that help hold the meat, you’ll probably have to have this already, because you won’t find anything like it in nature. But, just finding a strong, long, and sturdy piece of wood can create your own spit.
While it sounds easy to tie a piece of meat onto a piece of wood and turn it over an open fire, spit cooking comes with its own unique set of problems. For starters, any meat that can be tied to the spit has to be tied to the spit. This will keep the meat on spit stable and prevent it from bouncing around. It’s also important to remember that meat shrinks when it’s cooking, so even if you think you’ve attached the meat tightly to the pan, it may not be close enough yet. Using rope, vines, or twine to hold the meat to the spit. If you roast a whole animal, make sure that you tie up the limbs as well. If you don’t, the center of gravity will be thrown off and the meat will bounce around the spit again, instead of sticking to it.
Also remember if you don’t turn the spit, you ‘re broiling, not cooking spit. Out in the wilderness, and especially in situations of survival, you probably won’t have a spit that will turn for you automatically, so you’ll have to sit by the fire and rotate it yourself manually.
Clay Cooking
Some believe that our earliest ancestors cooked in clay, but that’s just not the case. By the time clay instruments were adopted, people had been cooking for centuries. But you don’t have to bring a clay pot that is susceptible to breaking while backpacking – dig deep enough and you’ll find it. Only make sure that the location you are digging for the clay wasn’t once the place of hazardous chemicals – like being the former gas station site.
You can add a bit of water to mold it into shapes like bowls and pots once you’ve found your clay, although it will take hours to dry. You can also just pat the clay on and around the food wrapped in it. Be sure when doing it this way that the clay is in an even layer, to promote even cooking. Then, simply lay the clay-covered pack over hot coals and let it cook. ,Cooking time will depend not only on the size of the food being cooked but also on the thickness of the clay.
One of the most exciting parts of clay cooking is serving food that has been cooked in barley. Use a small hammer or rock to break open the clay as the heat will harden the clay around the food. It is going to crack and fall apart, and make meal time that much more attractive.


