As a new gardener, I often found the task of growing prize-winning tomatoes and succulent melons very daunting. Can I say succulent melons here? Get your head out of the gutter! But growing and drying your own herbs, now that was a new task.
Gardening has never come naturally to me. But I learn and grow each and every year. I finally began to master tomatoes by the third year of gardening. But I’ve still never mastered the green bean.
It’s easy to get discouraged when you’re gardening, but I’ve found one thing that I can never kill. I suppose I could if I drenched it in chemicals, but ultimately, they’re very forgiving. What is it, you ask? Why, herbs, of course!
Herbs are one of the easiest things in the world to grow and maintain. Drying your own herbs is one of the easiest skills to learn, and will come in handy often. Whether you’re drying them once harvested, making a tincture, preserving dried herbs into spice rubs, or simply hanging them until you’re ready to use them. There are plenty of ways to grow and preserve herbs on your homestead.
Growing Your Own Herbs
My favorite way to preserve my herbs is to dry them. This allows me to crush them into powder form, or leave them in a loose form. Either way, I love using them while cooking, making tinctures, creating spice rubs, and more.
But before I dry them, I, of course, need to grow them!
Because of their healing properties, cooking enhancement, or ease of growth—here are the herbs I grow most often on my homestead.
- Oregano
- Echinacea
- Thyme
- Rosemary
- Spearmint
- Peppermint
- Lemon Balm (Melissa)
- Cilantro
- Dill
- Garlic
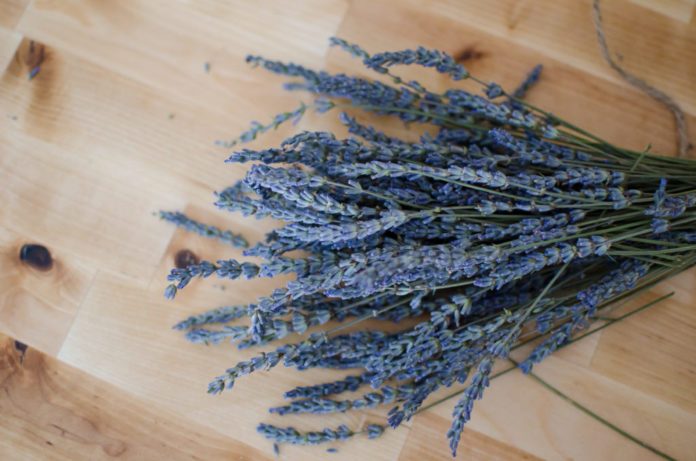
- Lavender
- Onion
The first part of this list of herbs is extremely easy to grow, harvest, and maintain. Garlic and lavender are a bit harder but well worth it. Most of these you can even bring inside in the winter months and continue to harvest from them if you choose to grow them in large pots near a sunny space. Garlic never needs to be brought inside. You can see how we plant garlic here.
We love container gardening, so we grow most of our herbs in large pots each year. Some naturally die off and grow back (perennials such as peppermint and lemon balm), while others need to be brought inside and tended to throughout the year. Or, the other option is to harvest their seeds in the Summer and replant indoors in the Winter for Spring plants. You can also grow herbs in garden beds, but be sure to do your research, because some herbs—like the mint family—enjoy spreading like wildfire.
Related: Remedies for Poison Ivy Rash
Before Growing and Drying Your Own Herbs
Whether you’re growing your herbs in containers or in the ground, there are a few things to consider before you get started.
Make sure your soil is healthy and fertilized.
Because nothing grows well in hard dirt that doesn’t have good fertilization. Add some rabbit manure (if you raise rabbits, like us), or buy an organic fertilizer from your local farm store.
Don’t place your herbs in an area that is in direct sunlight all day long.
Some herbs do well (like rosemary and stalky herbs), but most delicate ones do not. In the hot summer months, herbs such as thyme and cilantro (herbs with more delicate leaves) can scorch because they get too hot in direct sunlight all day. Sunlight for half the day is perfect. Indirect sunlight, or partial shade, for the remainder of the day, is ideal. Though, there are some that thrive in direct sunlight all day long (denser, oily, or stick like leaves such as lavender and rosemary). Be sure to read the information that comes with the seed package or plant package very carefully before deciding where to permanently place your plants.
Ensure that you have enough space for your plants to grow.
For example, don’t grow lemon balm in a garden bed that you need to keep tidy. Herbs like lemon balm and peppermint are expansive, meaning, they grow and spread like wildfire each year when they go to seed. They are “covering” plants, meaning, they cover the ground very well and very quickly. This is a great thing, however, because these types of plants you simply plant once, and then forget about them once they establish a presence in your flower bed. They will be there for years to come!
Research your herbs before ingesting them.
Whether you’re growing herbs to use for culinary purposes, or for medicinal purposes, be sure to do your research first, to make sure they are herbs that you should be using.
Harvesting Your Herbs
A lot of your herbs can be harvested throughout the entire growing season. Herbs like thyme, oregano, and peppermint, will grow for quite some time, even after you’ve harvested from the same plant several times. You can harvest your herbs a few different ways, but always make sure you harvest in the earlier part of the morning after all the dew has dried up, but before the sun sips away all the essential oils in the leaves.
The first way to harvest is to cut a portion of the plants almost down to the ground. This gives you a second cutting that will be aromatic but may not be as woody or full. It also takes longer to grow back in the harvest season. The second option is to only cut the plant part of the way off, about halfway down the plant, This allows the small portion of the plant to continue to grow, giving you multiple harvests, albeit in smaller amounts each harvest.


Drying Your Own Herbs
There’s no sense in growing and harvesting herbs if you aren’t going to dry and store them properly. Drying and storing herbs is incredibly easy. The only issue you may run into is the fact that you don’t have enough space for your bountiful harvests!
There are a few different drying methods you can try…
Drying in an Oven
More commonly used before the rise of dehydrators in the past few decades, you can easily dry your herbs by putting your oven on the lowest heat setting that it will go (around 180 degrees). Place your herbs on a breathable cookie rack or directly onto the oven racks so that the air flow can remain continuous. Keep the door to your oven slightly ajar, so that there is a constant movement of air in and out of the oven. The length of time will really vary on the herb. I’ve tried Thyme in less than 30 minutes because the leaves are so small and delicate. But it can take an hour or more with more woody herbs, like Rosemary.
Drying with a Dehydrator
More commonly used now, you can find fabulous dehydrators, like the 5 tray Excalibur one that I own, that you’ll make good use of for many things, not just herbs. We use our dehydrator often for things like jerky, fruit leather, drying fruit and veggies, and more. The temperature and time will vary by herb and dehydrator. Make sure you thoroughly read the instructions before beginning. Most herbs will do well around 115 degrees and will be completely dried when stems become hard and breakable, and leaves fall off when gently tugged.
Related: 13 Survival Foods You Should Always Have at Home


Drying Herbs in the Sun
We’re going back to our roots with this one. And yes, I have absolutely dried herbs in the hot summer sunlight, right on my own back deck. Choose a very sunny place that gets sun most of the morning and early afternoon. Lay our your herbs on a flat surface. I laid mine right on my deck. You’ll need to flip them throughout the day, and/or move them with the sun. On an extremely hot summer day, I’ve dried herbs in less than 2 hours. You can read more about sun drying foods in this Mother Earth News article.
Drying Herbs by Hanging or Drying Racks
The most commonly seen technique on places like Pinterest is hanging your herbs to dry, or to use drying racks. This can take days and even weeks at times to accomplish. And you run into more issues with mold if you aren’t getting proper airflow to your herbs at all times (ex: her bunches are too tight). With that said, this is probably the most common way to dry herbs and has been for centuries. A lot of people don’t like depending on electricity, or using machinery, to dry their herbs. The most natural way to try them is to dry them in the sun or to simply dry them on racks or by hanging them. While this takes up a substantial amount of space if you dry in large batches, it most certainly does work.


Storing Your Own Herbs
Storing your harvest after drying your own herbs is equally easy as drying it, if not easier. I really enjoy these little mason jars for my culinary herbs. I found these in the $3 Target bin, but you can find similar ones here. Furthermore, I find that the best way to store my medicinal herbs and herbs that are in large quantities is to store them in the half-gallon mason jars and then use the plastic screw top lids. You can also purchase chalkboard lids as well.
As long as your dried herbs are kept in a dark and dry place, in an airtight container, your dried herbs will last up to 18 months or longer, depending on the herb and the environment. As dried herbs age, they do lose their medicinal value. So using up that harvest in the first year is very beneficial to you and your family if you are growing herbs specifically for your medicinal cabinet. Culinary herbs can last an upward of three years when stored properly. Obviously, the quicker they are used, the better they taste, but it’s nice to know you have that option!
You can use fresh or dried herbs to create things like tinctures, salves, lotions, infused oils, and more. But that’s another topic for another day!


