There are a lot of food staples to consider when preparing survival kits, bug out bags or long term bunker food supplies, and your sweet tooth shouldn’t be neglected. It might seem like a luxury, but candy and cookies are on the list of staples that should be included.
Why? We see the skepticism in your face! Most preppers think in terms of preferences to fill the storage with nutrient-dense foods – and of course, that is a necessity. But what about low blood sugar episodes for diabetics? Frankly, low blood sugar can hit the healthiest of us, especially in crisis when excess adrenaline sends our body chemicals into overdrive.
Then some of us just wish to have just a little something tasty, sweet, and familiar. Sugar is one of our greatest addictions, and let’s be honest, do you really want to deal with withdrawals in the middle of an emergency?
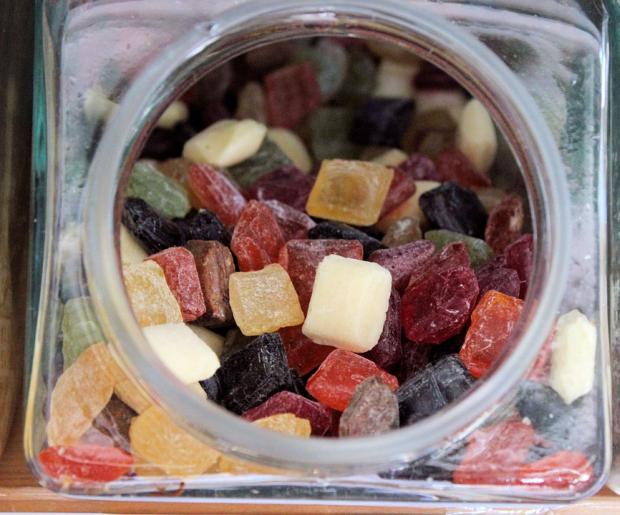
Hard candy, in particular, is perfect for the 72-hour emergency kit, hurricane kit, or any survival stockpile. There are a few candy options which have indefinite “quality” shelf-life such as Gobstoppers, Fireballs, Sweet-tarts, Smarties, Sprees, Life Savers, Lemon Drops, Root Beer Barrels, and I think you get the idea!
Grab any of your favorites that are hard and you have noticed that does not go bad over time – the ones that you forget in your pocket or the bottom of a purse, and find it a couple of weeks later with a beat-up wrap still tastes like you just bought it once you pop it into your mouth. Those will last you a while!
Candies like mints or candy canes stored in airtight containers and unopened have a “quality” shelf life of around 1-2 years. Even if stored without their wrappers will typically last four to five weeks without getting soft. They will last longer if you use vacuum-sealed containers though, so keep a few around and stock up on your favorite goodies.
Chocolate can be stored but it needs to be vacuum sealed and airtight so you can keep the oils in it from going rancid or turning white. We suggest using two-quart glass jars to seal in the chocolates so that once they are opened and used, the jars can be reused for other item containment or drinking.


Two-quart jars will be large enough to fit at least a week’s worth of chocolate candies and snacks for one person, even if you have a monster sweet tooth and your particular weakness is the mighty cacao bean. Storing a portioned amount allows for rationing and keeps your goodies fresh for the longest possible time.
If the thought of store-bought candy is unacceptable or if the items are unavailable in your current situation, do it yourself candy is a great way of adding something sweet to your kit. Here are a few of our favorite, kitchen-tested, prepper, and mom-approved recipes. Enjoy!
Related: 30 Survival Items To Get In The First 30 Days Of Prepping
Basic Hard Candy Recipe
Ingredients needed:
2 cups of granulated sugar, 2/3 cup light corn syrup, 2 ½ tablespoons flavoring, ¾ cup water, food coloring (optional), powdered sugar, corn starch, cooking spray, and extra water for your pastry brush.
Equipment needed:
Measuring cups, measuring spoons, large saucepan, cookie sheet, parchment paper, candy thermometer, pastry brush, metal sifter, wooden spoon, sharp knife.
Explanations and substitutions:
Cornstarch added to the powdered sugar reduces the stickiness and will assure the candy does not clump together in the container.
Aluminum foil can be substituted for parchment paper, however, do not use wax paper because the paper will stick to the back of the candy.
Flavorings and colors can vary for specific tastes and desires. If you are making several batches or more than one, it would be a good idea to color-code your flavoring. For example, cinnamon is most commonly known as having a red color and mint flavor having a green color.
Color is not necessary though to the overall taste of the candy and is only for aesthetic. Keep in mind that some people have more taste sensitivity and can taste the dye, a taste they do not find pleasant.
Step 1:
Line the cookie sheet with parchment paper and spray lightly with cooking spray. Set the prepared cookie sheet aside. Spray the knife lightly and set aside as well.
Step 2:
In your saucepan, add sugar, light corn syrup, and water and cook over medium heat until all the sugar crystals have been dissolved.
Step 3:
Place the candy thermometer in the pan, making sure that the tip of the thermometer does not touch the bottom – this will skew readings and ruin your candy batch.
Step 4:
Bring the mixture to a boil – don’t stir it at all.
Step 5:
Wash down the sugar crystals that start to accumulate on the sides of the pan with a very wet pastry brush. Just push them down back into the water with the bristles.
Step 6:
Continue boiling the mixture until it gets to somewhere between 250 and 260 degrees Fahrenheit. After you reach that temperature, add your desired food coloring until you achieve the desired color. Do not stir the mixture after you add the coloring because the boiling will mix the syrup thoroughly. At this stage, you are not yet turning the heat down.
Step 7:
At 300 degrees Fahrenheit, remove the saucepan from heat. After boiling of the syrup has stopped, add any flavoring and stir thoroughly. Avoid popping of the syrup and steam.
Step 8:
Pour the hot syrup carefully onto the prepared cookie sheet and let it sit for 15 to 20 minutes, or until it is set enough to not burn the skin and can be worked manually.
Step 9:
Using the prepared knife, cut the cooled candy into squares or triangles. After the pan of candy has been cut, let it cool completely for approximately 1 hour.
Step 10:
Prepare a 50/50 mixture of cornstarch and powdered sugar.
Step 11:
Cover and coat both sides of the candy in the powdered sugar mixture, using a metal sifter. Then break the pieces along the scored lines and place in an airtight container or bag.
This recipe makes approximately one pound of candy with a storage life of approximately four to five weeks.
Sugar-Free Survival Candy
Need your sweet treats to be sugar-free? That’s not too difficult either! Switch out the sugar for stevia. Do not stress about artificial sweeteners – stevia is a 1:1 substitute that is an herb, and if you choose a high quality one, it has medicinal benefits in addition to the bonus of sugar elimination.
You can even make the sugar in powder form to be sugar-free by using xylitol. Blend it in your blender until it is a fine powder – and that is all there is to it!
Check out some other homemade candies that have a great shelf life and are delicious for when a prepper just needs to enjoy a sensory pleasure for a bit!
Dark Chocolate Fruit Bark
Ingredients needed:
16 ounces of dark chocolate chips, 8 ounces of dried blueberries or cranberries, and four ounces of roasted, chopped almonds, cooking spray
Equipment needed:
Double boiler, baking sheet, parchment paper, spray oil
Step 1:
Line the cookie sheet with parchment paper.
Step 2:
Place the chocolate chips into a double boiler and stir them until they are melted.
Step 3:
Add dried blueberries and mix well.
Step 4:
Pour the chocolate mixture onto the prepared cookie sheet.
Step 5:
Refrigerate until set, about 30 minutes.
Step 6:
Break it into pieces.
Step 7:
Store the bark in airtight and vacuum-sealed Mylar bags inside of containers.
Easy Peanut Butter Granola Bars
Ingredients needed:
¼ cup chunky peanut butter, 1/3 cup honey, ¼ cup brown sugar, 1 cup granola, 1 cup puffed rice cereal, 1 cup quick-cooking oats, ½ cup chocolate chips, ½ cup chopped dried fruit of your choice, Crisco or cooking spray
Equipment needed:
A large saucepan, wooden spoon, large bowl, square cake pan, parchment paper
Step 1:
Combine the peanut butter and honey in a saucepan and melt them over medium heat.
Step 2:
Dissolve the brown sugar into the peanut butter mixture; then leave it to simmer for 2 minutes.
Step 3:
Mix all of the remaining ingredients together in a large bowl; you can combine them in any particular order.
Step 4:
Pour the peanut butter mixture over the other mixture and fold them together so that the granola is coated completely.
Step 5:
Grease your cake pan with the Crisco or cooking spray, then line it with the parchment.
Step 6:
Pour the mixture into the prepped pan and press so that it makes a smooth, flat layer.
Step 7:
Cool your treats on your countertop until set.
Step 8:
After 15 minutes you can cut them into bars.
Step 9:
Store the bars in airtight or vacuum-sealed Mylar bags within sturdier containers.
Related: 32 Foods for Your Bug Out Bag
Storing Your Sweet Treats
When planning your kits, it is important to think of the types of containment appropriate to your kit, to the shelf life of your intended items, and for the recipes of the items you intend to prepare.
There are five enemies of food storage which should be considered when attempting to contain your candy; heat, humidity, oxygen, light, and pests. Heat can be difficult to regulate with any containment situation. There are some options that are better for some items and some not so much.
Original containers
Original containers are not great at protection from rodents and should be checked regularly for use-by dates.
Plastic containers
Plastic containers are cheap options for food containment. They are however not rodent-proof but do provide some protection from humidity. They are susceptible to humidity and oxygen. They are not good protection from light but are difficult to break.
Plastic containers are less heavy than some other options but do leach plastic into foods. Plastics are not recommended for long-term food storage and need to be rotated every six months.
Glass containers
Glass containers do not protect from light unless you are using brown glass or colored glass. But even when they are colored glass, they are not foolproof. Glass is also easily breakable and very heavy. Shelving will need to be reinforced for storage.
Food grade buckets
Food grade buckets are great for storing large amounts of food and are great at protection against light, humidity, and oxygen. They are not great for easy identification, so it is important to label and date foodstuffs.
They are not easily breakable unless they are frequently opened and closed, and they only need to be rotated every year to two years. These containers can be cost-prohibitive unless sourced for free.
Mylar packaging (air sealed)
When good quality Mylar pouches are sourced and vacuum-sealed properly, then you will create an airtight, oxygen-free environment where food can last for a very long time. They are great for individual packaging for small items.
Most types of survival food will be good in Mylar pouches for three to five years. These packages are prone to rodents and easily broken through, so we suggest storing inside a bucket or a jar as an added protection. Mylar pouches and sealing equipment will have to be purchased unless you have already sourced them.
Wrap-Up
Preppers are worried about their pantries to stay stocked with basics and essentials, nutrient-packed foods with long shelf lives, goods that go a long way with just a little. And that is not a wrong perspective! You cannot forget though that you need a little pleasure in the tough times, and you may even have a medical emergency that requires it. Make sure you have some well-stored sweets to keep you going when you need a little boost!


